I absolutely love when my kids spend time quietly creating something wild and crazy with a Kleenex box and empty toilet paper rolls, or drawing pictures of characters and animals. But on the flip side, its more stuff to have to store and more clutter.
After years of stuff in our multi-purpose room (ok its my poor husband’s office as well as the games and kids’ arts and crafts storage room!) piling up to the heavens and every organizational solution I have put in place failing, I knew it was time to figure out how to declutter and repurpose the kids’ artwork.
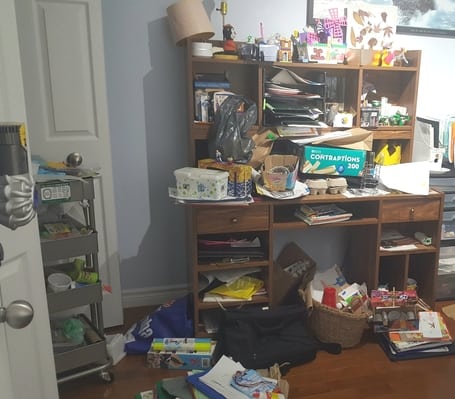
I know every mom is agreeing with me when I say its hard to declutter childhood stuff in general and also know how to decide what mementos to keep. When it comes to kids’ artwork, I find it especially difficult because kids often believe that every creation of theirs is simply a masterpiece and should be kept forever!
So how can we tame the kids’ arts and crafts clutter but continue to help them be motivated to create and take pride in their work?
The answer is to find ways to repurpose and display their selective pieces of art, while moving some of those creations to the recycle bin.
Different Ways to Display Kids’ Arts and Crafts
1. Hang it Up
When you hang up a child’s artwork, you will see them beam with pride. Displaying their artwork makes them feel confident and acknowledged for their efforts. It could motivate them to do more, and before you know it, you could have a real artist on your hands.
Its best to create a separate space to feature their artwork and change it up regularly. There are so many different ways you can display pictures on a wall. Here are some to name a few:
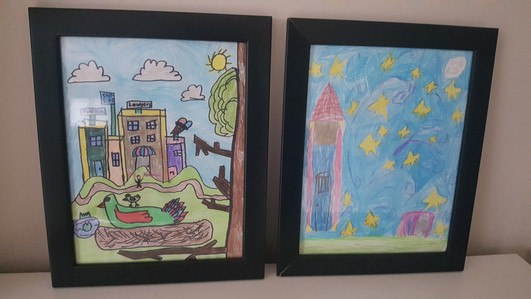
- put it in a picture frame
- pin it to a bulletin board
- hang several works of art on a clothes lines down a staircase or around a room
- place on a magnetic board or the refrigerator door and rotate different pictures
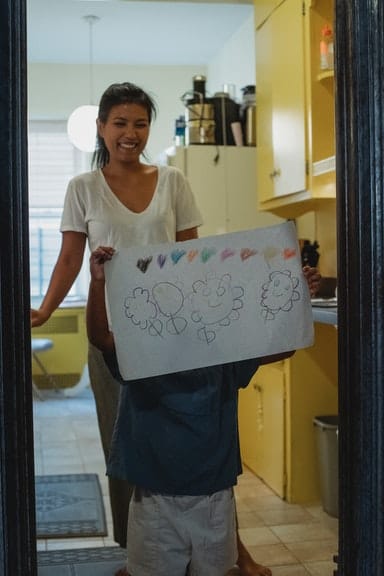
2. Turn it into a Greeting Card for Someone

My kids love to make family members cards for their birthdays and other holiday gatherings. One day as we were putting together all of their recent drawings, I suggested that they give some pictures to family like their grandparents but in the place of a birthday card.
It was a win-win situation for all of us! I get to reduce the amount of art we have and they get to give a grandparent a special picture as part of a birthday greeting.
3. Display it on the Front Door
Often times the kids will draw pictures that have to do with changing seasons or special holidays. If the winter season has started and I see they have drawn pictures of snowmen, or a picture about a holiday like Thanksgiving, I put it on the front door for passerby’s to enjoy.
I just put the picture in a plastic cover, seal it and tape it to the front door.
4. Create their own Portfolio

I have purchased the kids their own photo albums with full size pages. They get to pick their most favorite artwork and create their own art book. Then they get to keep it on their bookshelves in their bedrooms.
They just love flipping through the album and looking at their work like that. They also often replace pictures on their own with more recent creations and are ok to let the other ones go in the trash.
5. Allow the Kids to Declutter
We have a large basket which we keep in the room. In that basket we put all of their completed arts and crafts. Once it gets relatively full, which is typically after a few months, I sit down with the kids and go through the basket with them.
Its their choice to:
1. Hold on to it and then decide where they would like to keep it (an album, hang it up etc.)
2. Place it in the recycling bin or trash (if it can’t be recycled)
3. Take a picture of it first to save it and then throw it away. Don’t forget to save them to their personal folders on a computer or external hard drive.
Going through this process regularly really helps us keep the arts and crafts clutter under control.
Check out this article: 10 Tips to Get the Kids Cleaning Up After Themselves
6. Incorporate it into your Home Decor
We often draw inspiration from the colors of a beautiful piece of art when buying home décor items that then complement that art. The same can be done with art the kids have made that you really love. You can also display the art in a more focal part of the room such as on a fire place mantel or shelf or hung over a sofa.

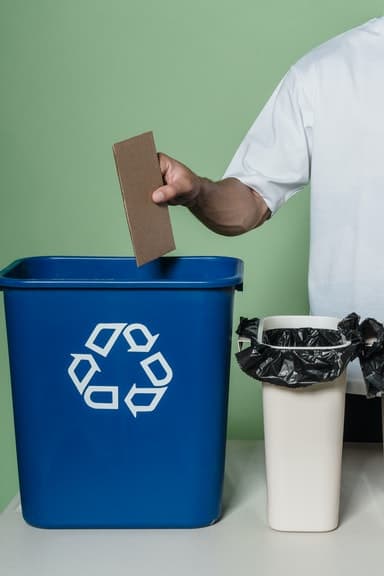
7. Throw it Away Discreetly
I told my husband once that we can never cancel the newspaper and go electronic until the kids have grown out of their arts and crafts phase! Yes, I confess there are many times that I secretly put their art between the newspapers and throw them in the recycling!
However, I go through an actual criteria before I qualify a piece of art for the trash! I ask myself the following questions:
1. Is it original art? Was it something that was hand drawn or created from their imagination?
2. Does it have any personal connection? For example, is it a picture of a pet or family?
3. Did they put a lot of time and effort into it?
4. Have you had it for long enough that they have forgotten that it exists?
If I have a solid ‘No’ from questions 1 to 3 and a ‘Yes’ from question 4, away it goes into the trash pile!
8. Keep it Because you Love it!
There written stories and the cutest most imaginative drawings and crafts that kids can come up with that moms especially have a hard time parting with.
So keep them safe and go through them every once in a while for great memories and a good laugh!

Take a large bin and even consider using file folders to separate the art by child and by age so you will always remember when they made it.
Here’s to hoping our kids keep creating art without creating all the clutter!
2 thoughts on “How to Declutter and Repurpose Kids’ Arts and Crafts”